


26. My guide to developing recipes
Recipe testing is hard but it doesn't have to be. Read my guide to learn how to test like a professional.

Hello,
Welcome to another edition of Roll With It, I’m so happy to share it with you!
It’s been a month of Hot Cross Buns, sunny walks, family time, lots of reading, Easter eggs, finally receiving my Irish passport and a lot of ‘failed’ bakes (more on this later).
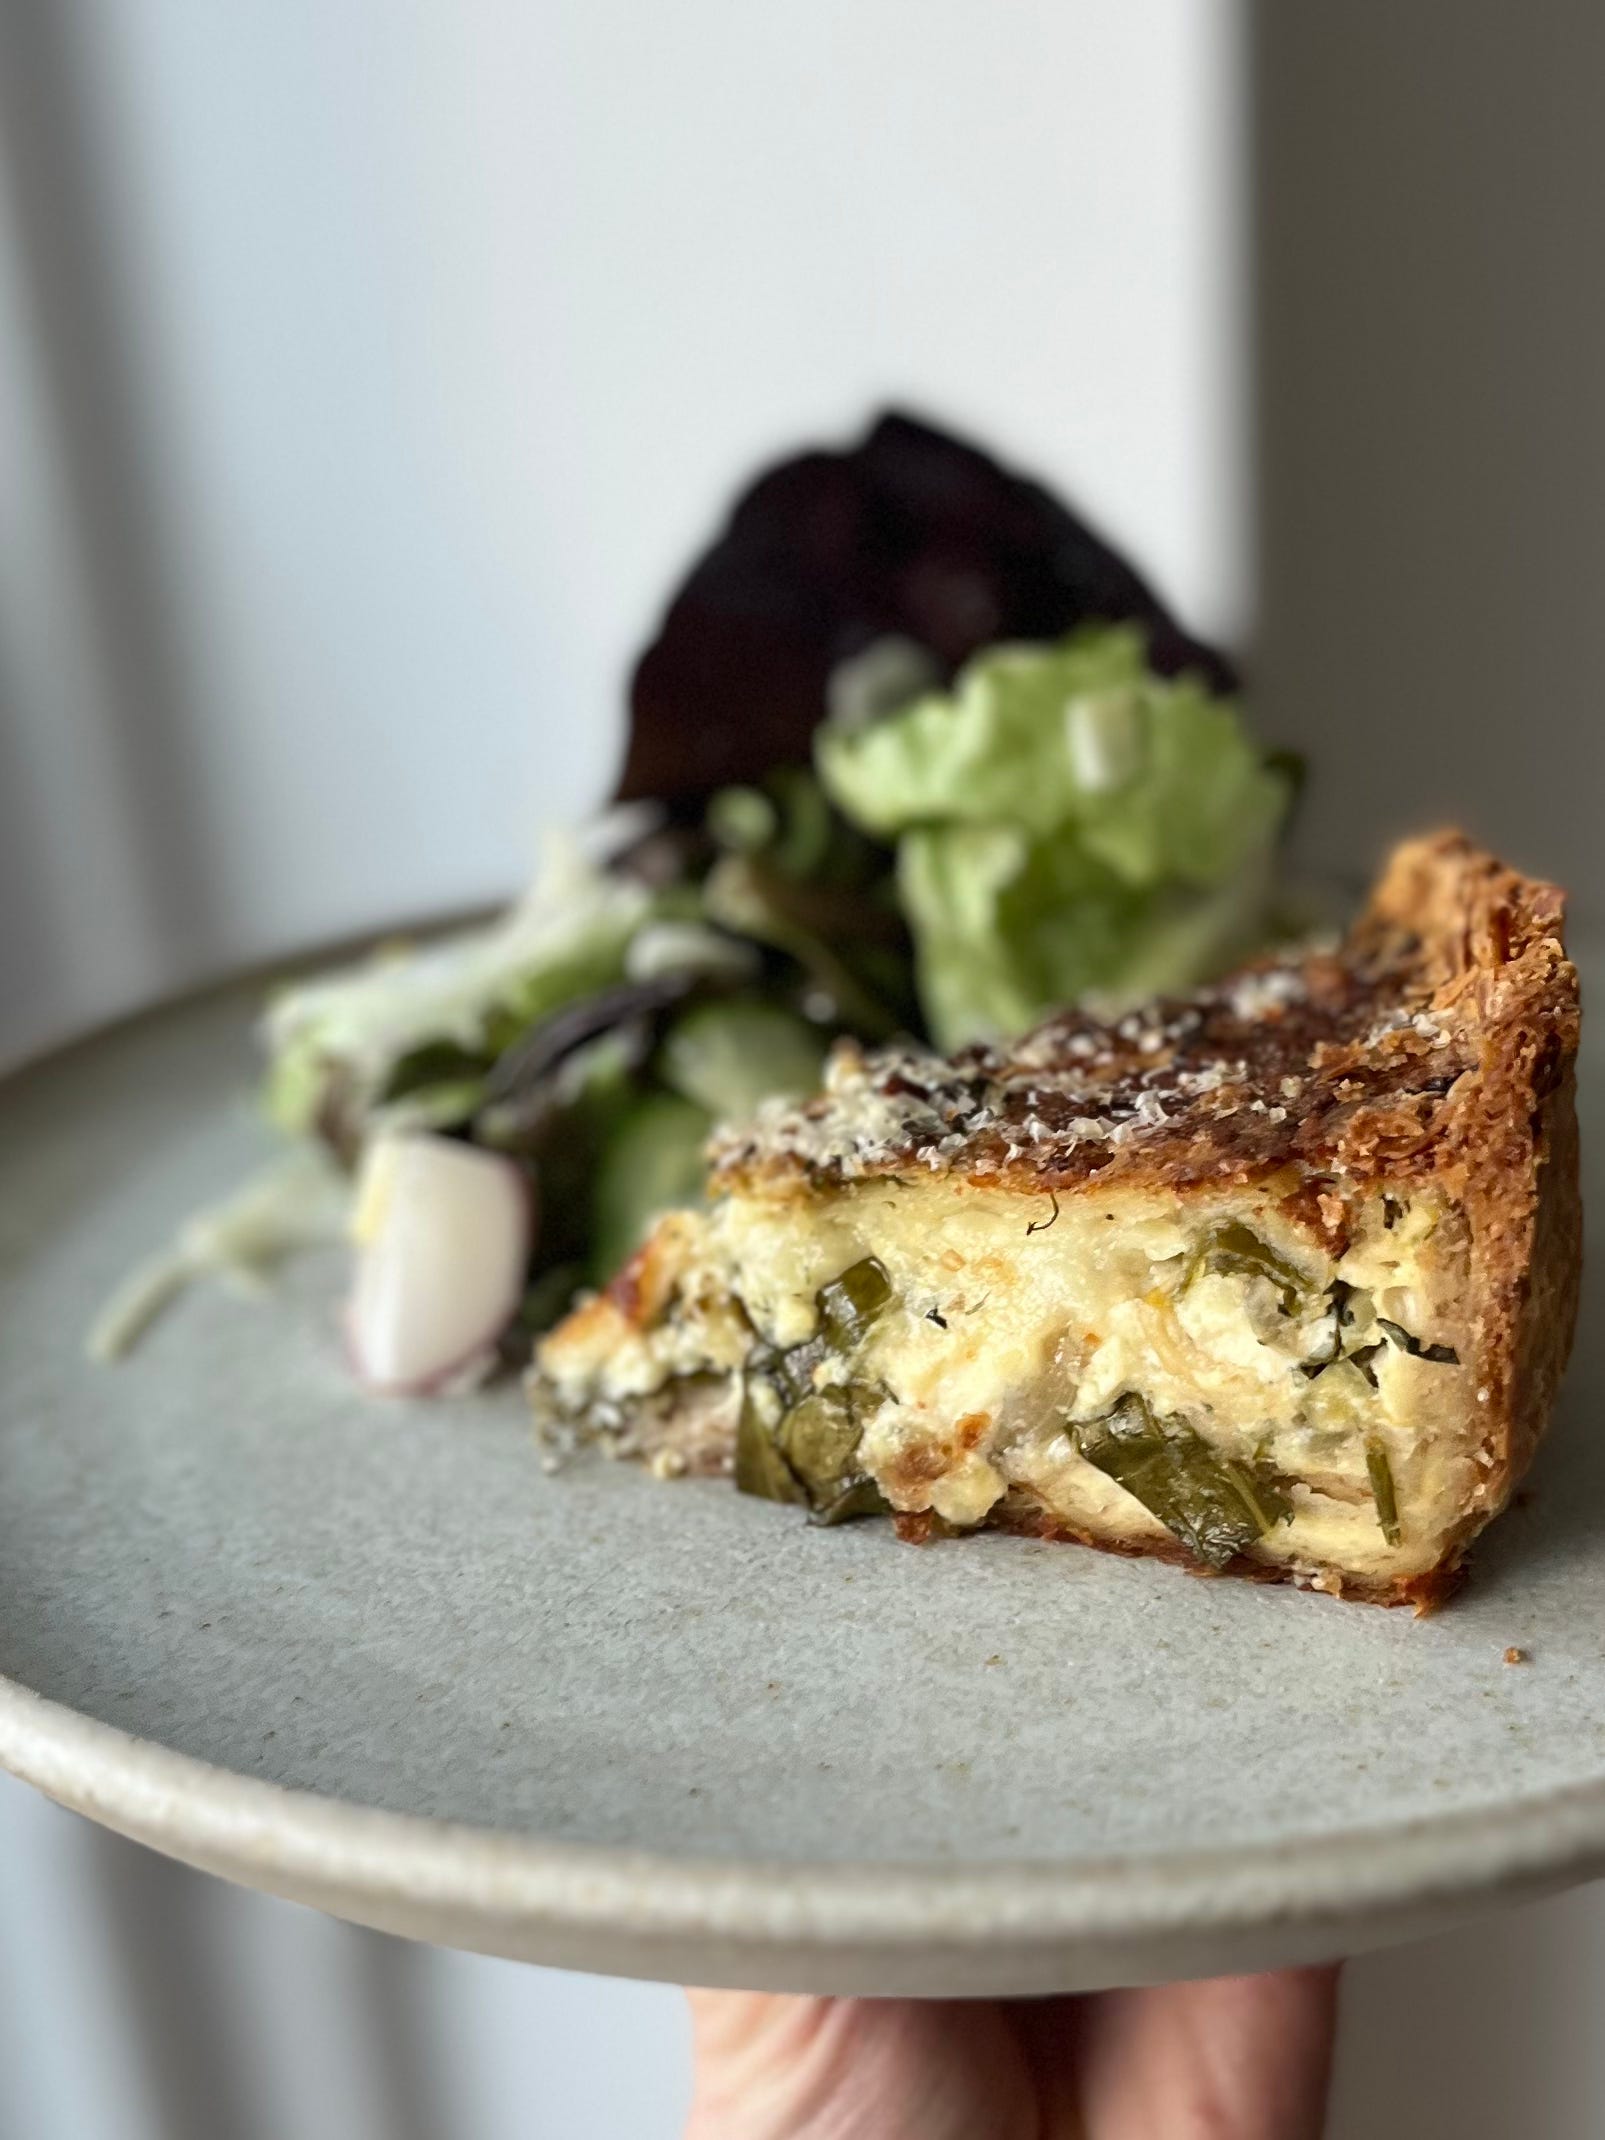
For this month’s newsletter I had an idea to make a Spring quiche; loads of soft herbs (like tarragon, parsley, chervil and dill), as well as sweated down scallions and spring greens (like nettles, cime di rapa, collard greens or swiss chard), all suspended in a thick mixture of dairy and eggs and closed in a pastry jacket. I spent a whole morning planning the recipe, then the rest of the afternoon gallivanting around sourcing all my ingredients. The next day I made this idea, only to figure out that maybe I don’t actually like quiche all that much. It was all the right things; ooey umami cheese, crunchy buttery flaky pastry, sweet sweated down onions, but was it joy inducing enough to make me want to make it again, or eat the remaining 7 slices every night for the rest of the week, or write the whole recipe up for you guys? Not really. So sadly for you (if you’re a quiche lover) there is no quiche recipe here this month. There is however a lesson to be learnt from this, and that’s a lesson in how to successfully recipe test.
In this newsletter, I’ll be sharing with you the best way to tackle testing a recipe, whether that’s for someone else or for your own creative genius. It’s a guide that will help you be the recipe tester I aspire to be (because I definitely cut some corners).
I hope you enjoy.
Cissy…xo
A note before we start. When referencing something as a ‘failure’, please note it doesn’t mean you (or I) have FAILED. Failing is not a measurement of your self worth or competence. It is simply the only good word to use when something doesn't work out well. From these ‘failures’ we always learn, even if it doesn’t feel like it at the time.
My guide to recipe testing
Where to start.
Inspiration can mature over time as you capture lots of little ideas (by tasting different flavours and dishes, reading recipes, or watching videos) or it can come to you in an instant without much thought at all (usually in the middle of the night). Both can energise you and spur you into the kitchen in a creative frenzy. This has happened to me many times; when I get a sniff of something, I want to make it immediately without much thought. BUT this is where most of my kitchen failures happen. Without stopping to think, plan a recipe, or hone in on why I’m using certain ingredients, I’m often left with something I’m not particularly happy with.

Research and planning
Get a notebook, write down all your ideas, even if they seem crazy. Then, read them all back to yourself. Then, close the book and walk away. TRUST ME! Let what you’ve written bounce around up there. Over time (a few hours, days or weeks) these thoughts will materialise and mature into something much more coherent.
I think I’m ready to hit the kitchen.
Slow down there! Your idea might have started growing legs but trust me, you’ll want to let it sit for just that little bit longer. This is the time when you should start honing in on your recipe. Write it down, method, ingredients, the whole lot, as if you were reading it from a cookbook. (I have to admit this isn’t something I usually do, I’m more of a ‘write the method after I’ve made it’ kinda gal, but then I’m always scrambling to remember things. So don’t be me, be the person I want to be). Then research similar recipes and compare them to the one you have written. Taking particular interest in flavours and ingredients.
This recipe writing is a crucial step, as it’s technically the hypothesis in your science experiment (baking is a science after all). You are writing down what you think is going to work, and why. And by looking at other similar recipes you are essentially backing up your idea and seeing if you missed something important. It will also help you think more about whether your flavours will pair well together (or not). My favourite book for this is Niki Segnit’s The Flavour Thesaurus. For theory, I’ll turn to On Food and Cooking by Harold McGee, The Pastry Chef’s Guide by Ravneet Gill (the spine on my copy has completely broken from wear) or online resources like Nicola Lamb’s Kitchen Projects. Learning is power!

Baker’s percentages
If you want to get technical, you might even write your recipe following baker’s percentages. This is when you express all the ingredients in a recipe (formula) as a percentage of the total weight of flour (which always totals 100%). I am not mathematical in any way, so it took me YEARS to understand this (and some very patient teaching from my friend Shane). But once you have it down, you’re flying! It really is the best way to use a recipe as it allows you to scale accurately, make easy adjustments and helps quickly identify problems. Perhaps more on this in another newsletter if you fancy? (Comment below).
Included in your planning should be your TIME, BUDGET and ENERGY.
If these were all infinite, we’d be laughing, but they’re not. So, you need to work within your means. As an example, for my newsletter I set aside ½ day for planning, a full day for recipe testing and photographing, then another full day for writing and editing. A total of 2.5 days (plus extra rent free thinking, all of the time) which I would say is probably on the lengthier side of things, but obviously it’s something I care a lot about so I give it as much as I can. At the moment, I’m not able to pay myself for this time/work. Any income received from my paying subscribers (thank you, I’m very grateful) is used to buy ingredients. Anything on top of that is subsidised by my income, which is £14.50 per hour (10 hours a day, 4 days a week). With this in mind, it’s important I shop sensibly (but locally), consider waste from recipe testing (gifting to neighbours, friends and family), and use my time and energy in a balanced way. Oh, and always factor in the washing up!
If I were a full time recipe developer / tester my budget and time would be somewhat dictated by the client (publisher, brand, etc.). For this, fees range widely, sitting anywhere between the very low hundreds to the tens of thousands. Obviously this amount is dependent on the client’s budget but also on the length of project (e.g. a full cookbook or a single recipe), testing an author’s recipes versus developing them for them (ghost writing), editing and formatting text or even including your own photography. Sadly, a lot of smaller recipe testing opportunities aren’t as easy to come by these days, as publishers aren’t investing in external recipe testers for cookbooks. Any recipe testing is the author’s responsibility, whether that’s extensively testing themselves or paying a tester from their own advance.
As you can see, recipe development isn’t quite as simple as it use to be, especially with the rise of platforms like this. You are now required be skilled at not just cooking and baking but many other professions too. You must be proficient at writing long form essays, food styling, social media, business and photography. (It’s tough out there!).
Hitting the kitchen
Ok, back to business. You’ve planned as much as you can and now your ready to hit the kitchen. Before my scheduled recipe testing day, I always do my shopping the day ahead. This means I have everything ready to go in the morning. No faffing. Straight to it.
Begin by reading the recipe and method from start to finish, as if you’ve never read it before. Then go ahead and start baking. As you go make sure you take extensive notes; things that need amending, exact times of how long you whipped the eggs for, did you use a low or medium heat to boil the syrup, etc. I also find it very helpful to take photographs of the process, as it means I can look back at what I did at a later date. An important note is also to always test full batch sizes. I’m a devil for not doing this because I hate wasting ingredients BUT let me tell you, a stand mixer will never work in the same way if it has a tiny amount of dough in it, and an oven tray that has only 2 cookies on it compared to 12, is going to bake the cookies completely differently (because of heat distribution). Don’t cut corners.

The taste test
Now for the best bit - tasting! Hopefully you’ve been tasting as you go but when it comes to the final dish, always try and eat as much of a full serving as you can (I know, tough job). Why? It will help you evaluate the flavour, the presentation and the full eating experience.
Imagine you made a dark chocolate tart. You tried to eat a full slice but it was so intensely rich you couldn’t finish it (something we don’t want). This leads you to question how it could be more balanced (key word here). So instead you use a blend of dark and milk chocolate, or by serving a slice with a little crème fraîche, to allow the acidity to mellow the richness. Either way you are more informed and that will lead to a better overall dish.
Also, share the love by getting friends and family to taste what you make. They’ll give you an honest opinion I’m sure and it’ll help reduce waste.
What if it doesn’t taste good or it doesn’t work the way I hoped?
I believe the biggest challenge of recipe testing is managing expectations. As with most things today, we’re fed an idea that all food is perfect straight off the bat. This can filter into the subconscious, helping you construct this idea that something you’re going to make is 1. going to look exactly as it does online or in your imagination, and 2. be absolutely perfect and delicious on your first attempt. These expectations just aren’t realistic but are easily planted. This means that when something does go slightly awry it can feel soul crushing. Even though what you make will always be nuanced because of where you buy your ingredients, your baking style and your kitchen.


How to bounce back
So what? Maybe your beautiful dream didn’t quite turn out the way you wanted, but giving up on it will only leave you feeling more disappointed, so pull up your big girl panties and try it again! (In these moments it’s helpful to take a walk and try to remember that the only way to learn is to fail).
Before you start to test again, you must think about why something went wrong. Did you mis-scale something? Does that flavour actually not work well with another? Was the oven temperature too low? Was that technique the right one to use? Maybe that dish, tray, pan isn’t the right material. Maybe it was really hot that day so your dough fermented too quickly. Or maybe you just weren’t feeling great (yes, emotions can affect how you bake). The list of variables can go on and on and on.
As you make adjustments and test again, remember to only change one variable at a time. If you change too many at once you’re never going to know the reason why something did or didn’t work. When it eventually does work (and it will), the feeling of success will be unbelievably satisfying.
Be patient. Remember it is hard. Remember everyone fails. Remember to enjoy the process.
Baker’s percentages please!
Loved reading this Cissy. It is so crushing when things go wrong, I get so disheartened. When you are developing a recipe how many times on average do you test it out?